A beginner’s guide to Electron.js
Author
swordensenDate Published

Objective: This guide will teach you how to develop and distribute an Electron.js application.
Audience: This guide is targeted at Electron beginners. It is strongly recommended that readers have at least fundamental knowledge of HTML/CSS and Node.js as the Electron framework is built around these items.
Part 0: Understanding Electron
If you found this guide by wanting to develop cross platform applications then you probably know that Electron.js does just that. You can easily develop and distribute applications for windows/macOS/linux with the same code (bear in mind this does not include android or iOS).
The question becomes, “How does Electron accomplish this?”. In short; Electron launches a headless chromium browser which has access to the Node.js API via Electron’s own API. Which has plenty of use cases but, probably the biggest being is that your app can theoretically work without an internet connection.
If that sounded like a bunch of wumbo that’s okay but, it’s important to understand the Electron combines the browser and Node.js to create this seamless development experience for us.
Part 1: Your first Electron App (AKA Hello World — again)
Inspired by the getting started page https://electronjs.org/docs/tutorial/first-app and assuming you have performed step 0 of my previous guide.
Step 0. Navigate to your project folder (you can just create a new folder wherever on your computer) and run the command npm init and follow the prompt provided
Step 1. NPM Install Electron by running npm install electron --save-dev *NOTE* we use --save-dev instead of --save so you can work on multiple apps with multiple electron version the future.
Step 2. Create two new files called index.js and index.html
Step 3. Inside index.js enter the following code:
const { app, BrowserWindow } = require("electron");
function createWindow() { // Create the browser window. let win = new BrowserWindow({ width: 800, height: 600, webPreferences: { nodeIntegration: true } }); // and load the index.html of the app. win.loadFile("index.html");}app.on("ready", createWindow);
In this file we are importing the app and BrowserWindow modules from the Electron package we installed earlier. When the Electron app is ready we create a new BrowserWindow with the provided properties and load in our index.html file.
Step 4. Put some content into your index.html file.
It can be whatever you want but, I like to use <h1>Hello World</h1> for old time’s sake.
Step 5. Running your application
There are a couple of gotchya’s to running an electron application. The first of which is that you might expect to run your app via node index.js just as you would with any node application.
Unfortunately, that won’t work. You need to run your javascript via Electron’s binary which is conveniently included in your Node_Modules folder. If you have looked at Electron’s documentation you might think you can run your app via electron . . Which is close but, won’t work unless you do some additional setup configuring your environment variables and having a global Electron installation. Which is beyond the scope of this guide.
Instead we will make an npm script by opening the package.json file (which was created when we executed npm init earlier) and adding a new start script with the property electron . . Your package.json should look something like the one below:
{ "name": "electron-part1", "version": "1.0.0", "description": "An electron tutorial", "main": "index.js", "scripts": { "start": "electron .", "test": "echo \"Error: no test specified\" && exit 1" }, "author": "", "license": "ISC", "devDependencies": { "electron": "^5.0.3" }}
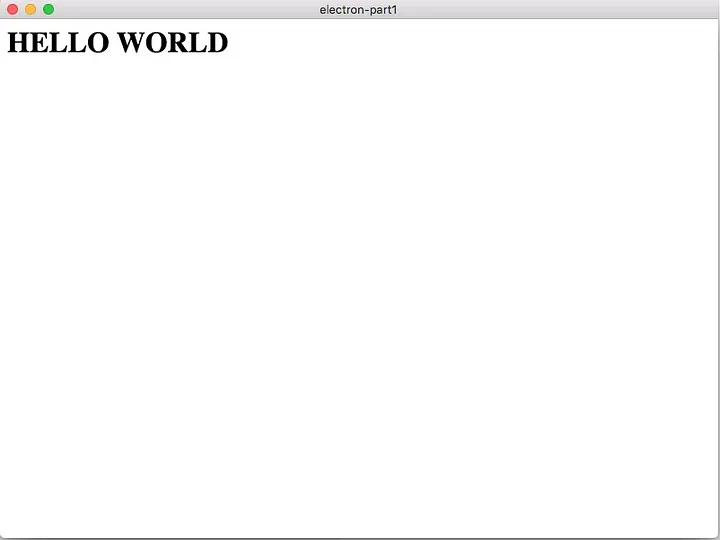
Finally, you can run your application by entering npm start in the terminal. And you should see a window that looks like this if you’re on a mac:
First Electron application

Part 2: Your actual first Electron app.
Okay hello world is great and all but, let’s try and practice with some of the actual functionality Electron provides. Don’t throw away the Hello World app because we will just be building on it.
Step 0. Add some styling
One of Electron’s biggest draws is that you can create an amazing custom GUI as easily as you can write html/css which is a hell of a lot easier than Qt and other native apps.
Create a css file called styles.css and include it in the root of your project and add the proper reference in your index.html file:
Any changes you make to your styles will show up when you re-run your electron project npm start .
I personally like to use skeleton.css for these demos because it’s lightweight and we won’t be needing much (and I’m too lazy to write css sometimes). It is important to remember that if you want your app to look the same offline you can’t include the cdn script in your html. You need to download the css file and reference it locally.
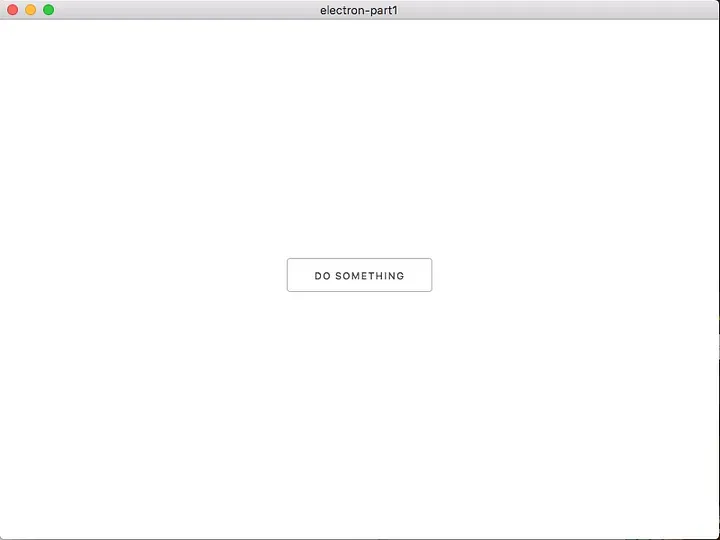
This guide assumes you know how to write html and css so I won’t go over that and you can just steal it from the github that I have linked at the bottom. In any case my electron app now looks like this:

Add a button that does something
Step 1. Add some functionality
Before you add the jQuery to your html file (which you totally can) let’s focus on adding functionality that does not occur in your normal browser. Our goal here is to be creating a text file and saving it to our computer.
*Note* You may have downloaded files to your computer before but, those are likely from server requests. Javascript running in the browser does not have write or read permissions to your file system.
1.1 Create a new file called app.js with the following code. This our javascript file that will only be running on the browser to capture user input.
1// note that the fs package does not exist on a normal browser2const fs = require("fs");3//a dialog box module from electron4const { dialog } = require("electron").remote;5// Also note that document does not exist in a normal node environment6// button click event7document.getElementById("mybutton").addEventListener("click", () => {8 const data = "Successfully wrote to the desktop";9 // the data we want to save to the desktop10 //launch save dialog window11 dialog.showSaveDialog(filename => {12 //save file at the destination indicated by filename13 fs.writeFileSync(filename + ".txt", data, "utf-8", () => {14 console.log("attempted to write to the desktop");15 });16 });17 });
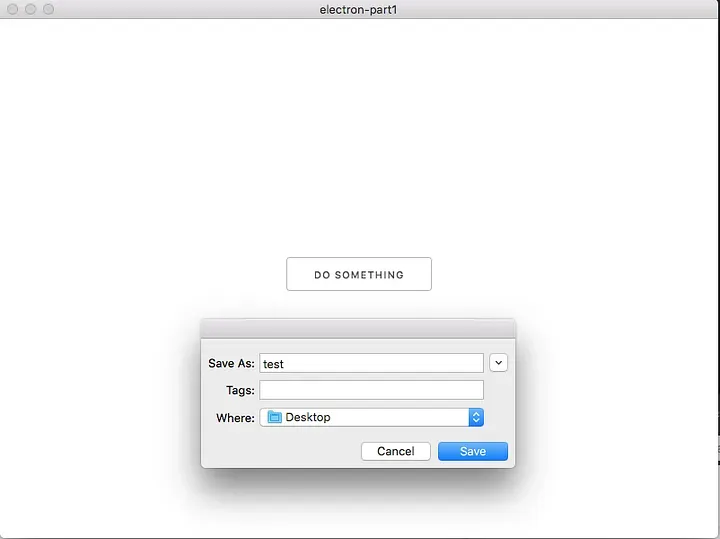
1.2 If you have added a button with the id “mybutton” then the next time you run your node application and click that button, you should see a success.txt automatically be generated where you decided to save it.
Not too bad right? More functionality will come the more you learn about Node and Javascript in general. But, hopefully now you have a solid fundamental understanding of how Electron works.

Final outcome
Step 2. Packaging your app
You probably know by now you can’t just hand your potential users the project files and hope they figure out how to run everything on their own. They likely don’t have node installed and why should they?
What we need to do is compile our application into a binary that our end users can simply double click and execute. To do that, install the electron packager by typing the following in your terminal:
npm install electron-packager --save-dev
Then add the following line to your package.json scripts
"package": "electron-packager .",
Finally execute the packager by typing the following in your terminal:
npm run package
You should see a new folder in your project directory that matches your current system. Included in that folder is an application (or .exe if you are using windows).
In Conclusion: This guide should have given you a fundamental understanding of how Electron works. If you had trouble following this guide I suggest spending more time learning Node.js before jumping into Electron. If this guide was too simple, I highly suggest checking out the following resources:
Electron Documentation: https://electronjs.org/docs
Electron Packager Documentation: https://github.com/electron-userland/electron-packager
GITHUB: https://github.com/Mikkal24/tutorials/tree/master/electron-part1
Comments
Join the conversation! Login to reply to comments

Guide to writing a Node.js program with command line arguments for beginners familiar with terminals.